A design does not have to be flattened to a PNG to reach After Effects. This page shows what each part of a Figma file becomes once it lands, one property at a time, using the real output of a transfer rather than an illustration of one.
Every image below is the result exactly as it landed in After Effects, transferred with Prism from the Figma file shown further down. Several of them put the two side by side so you can check the claim rather than take it. The section on what does not transfer is on this page for the same reason.
A design moving from Figma into After Effects
The source design
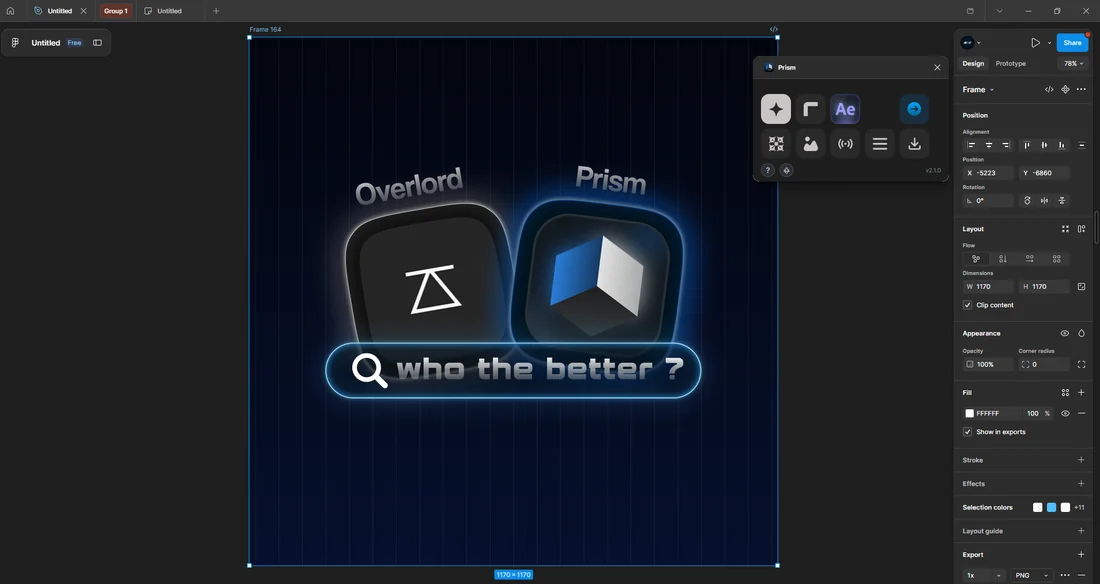
One Figma frame carrying every case at once: rounded shapes, a polygon, linear gradients, strokes, headline and body text, semi-transparent fills, a blur, a drop shadow and placed artwork.
It was sent to After Effects in a single transfer, and everything shown on this page came out of that one send.
What arrives is a layer stack
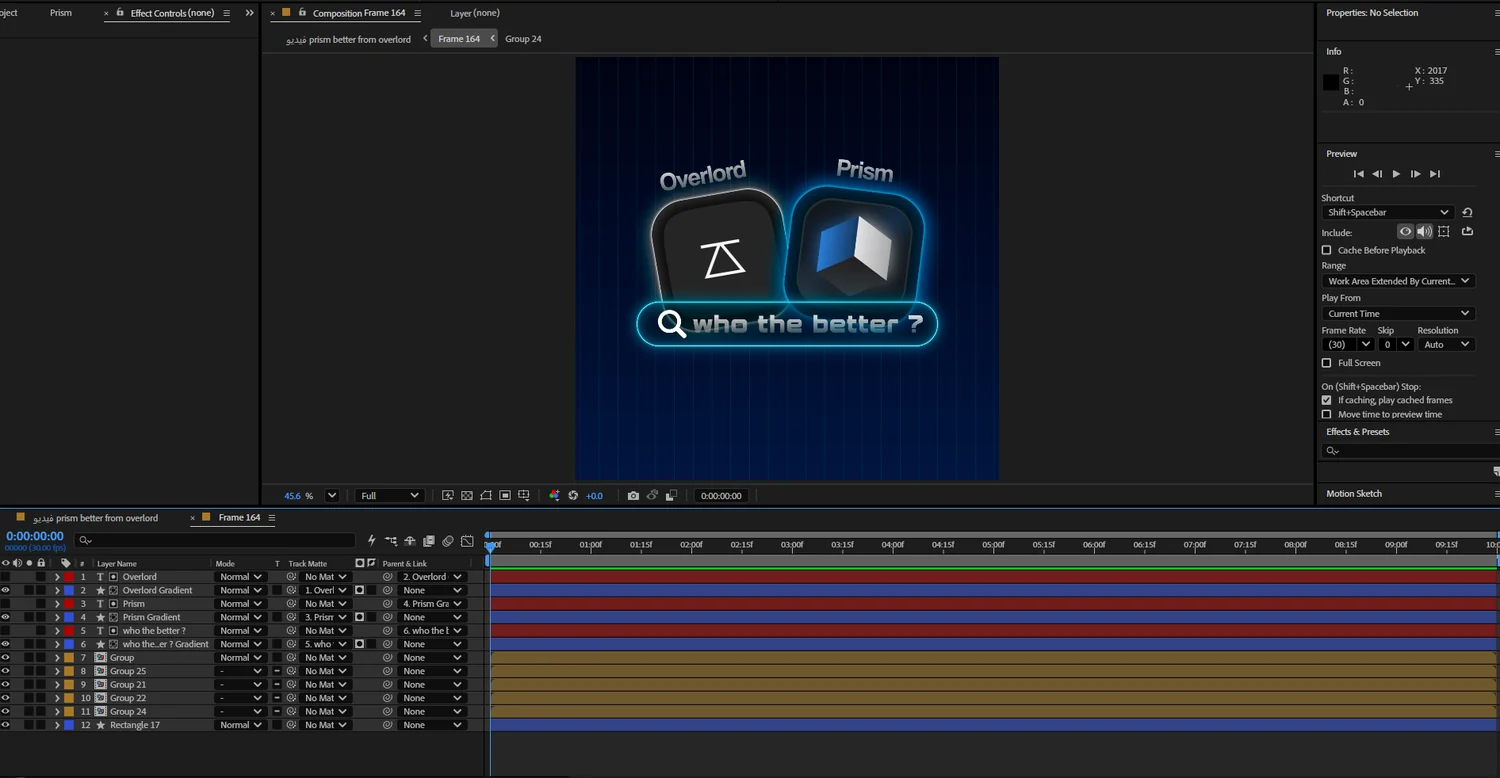
This is the composition immediately after the transfer, untouched. Every element of the design is its own layer, under its own name, in the order it had, with the frames and groups around it rebuilt as nested compositions and the parenting links already wired. Nothing here was placed by hand, and nothing is a flattened picture. That is the difference between receiving a design and receiving a screenshot of one.
The composition after one transfer, laid out automaticallyFigma on the left, After Effects on the right
Rectangles, ellipses, polygonsNative shape layers
Rectangles, ellipses, polygons
The frames, cards, buttons and dividers a layout is built from, with their sizes, corner radii and polygon side counts.
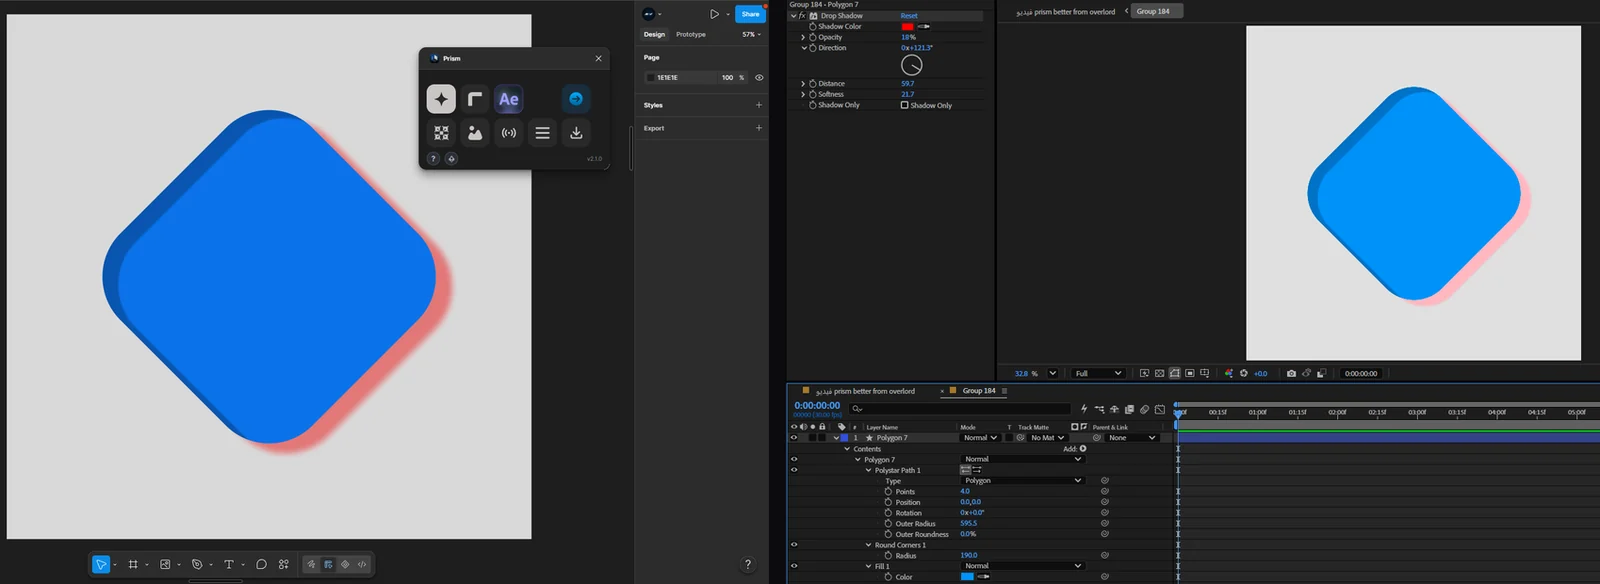
Each one becomes a real After Effects shape layer, not a picture of one. In the screenshot the polygon arrived as a Polystar Path with its point count and radius as live numbers, and its corner radius as a Round Corners modifier sitting above the fill. Widen the card, give the polygon two more sides, render at any resolution: it stays vector, and nothing goes back to Figma.
Result in After Effects
Text layersText you can still retype
Text layers
Headlines, labels and paragraphs, with their font, weight, size, letter spacing, line height and alignment.
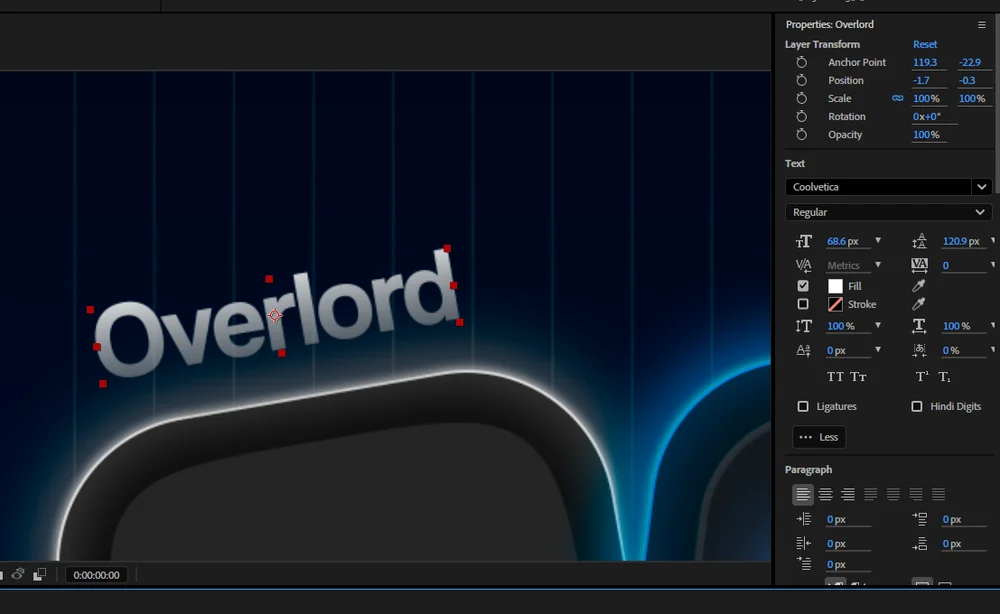
Text arrives as a live After Effects text layer. The Character panel in the screenshot is reading the real font and the real size off the transferred layer, not a screenshot of Figma: the family and weight are matched against the fonts installed on your machine. Multi-line and mixed-style text come across, and the anchor point is centred on each text layer, which is the small detail that makes scaling and rotating a caption behave the way you expect.
Result in After Effects
Linear and radial gradientsLive gradient fills
Linear and radial gradients
A fill built from colour stops rather than one flat colour, at whatever angle the design puts it.
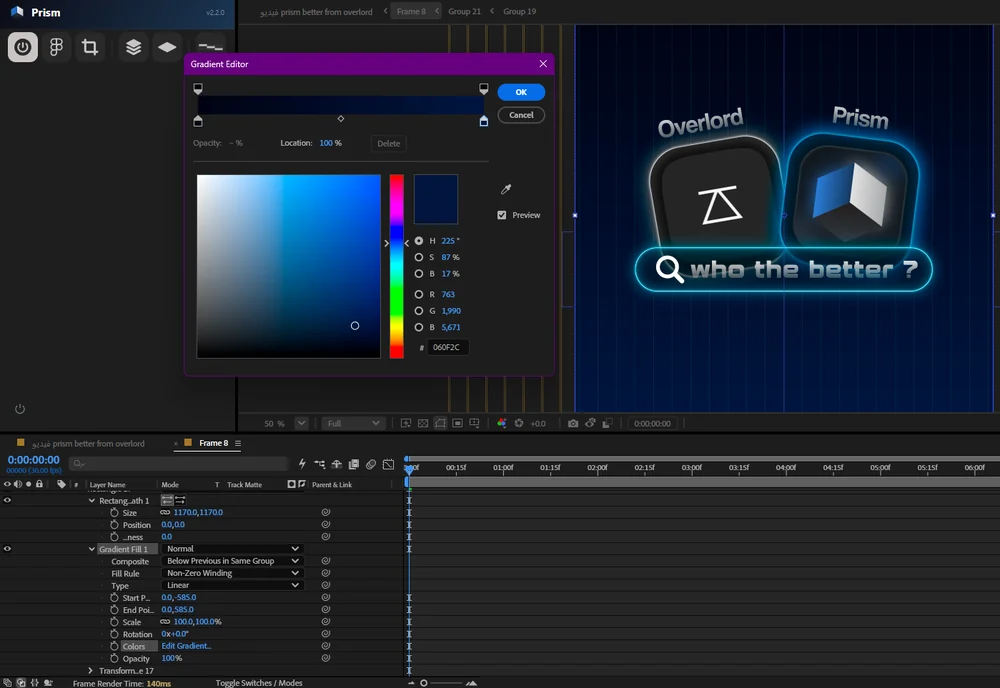
The gradient arrives as a real gradient fill inside the shape layer, with its start and end points, its type and its colour stops. The screenshot has the gradient editor open on a transferred layer: every stop is still there, still draggable, still recolourable. This is the part most often flattened into a bitmap on the way over, and it is exactly the part that makes a design look designed.
Result in After Effects
Strokes and outlinesIts own stroke, over the fill
Strokes and outlines
The border around a shape: its thickness, its colour, its dash pattern and the shape of its ends.
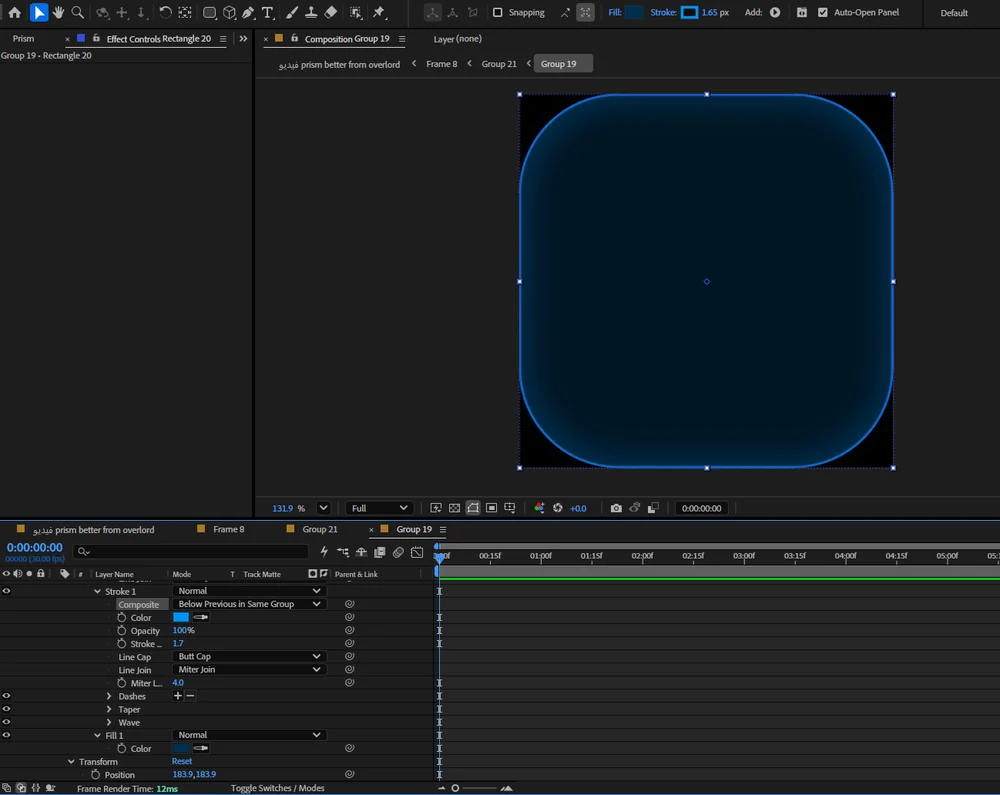
The stroke is built as its own entry stacked over the fill, the way Figma composes it, instead of being painted into the same pixels. In the screenshot Stroke 1 and Fill 1 are two separate rows under the same shape, each with its own colour and opacity. That keeps them independent: recolour the border without touching what it surrounds, or animate its thickness on its own. Dash patterns and line caps come across with it.
Figma on the left, After Effects on the right
Layer blur and drop shadowReal effects, with the design's numbers
Layer blur and drop shadow
The two effects that carry most of the depth in a modern layout: a softened layer, and a shadow offset behind an element.
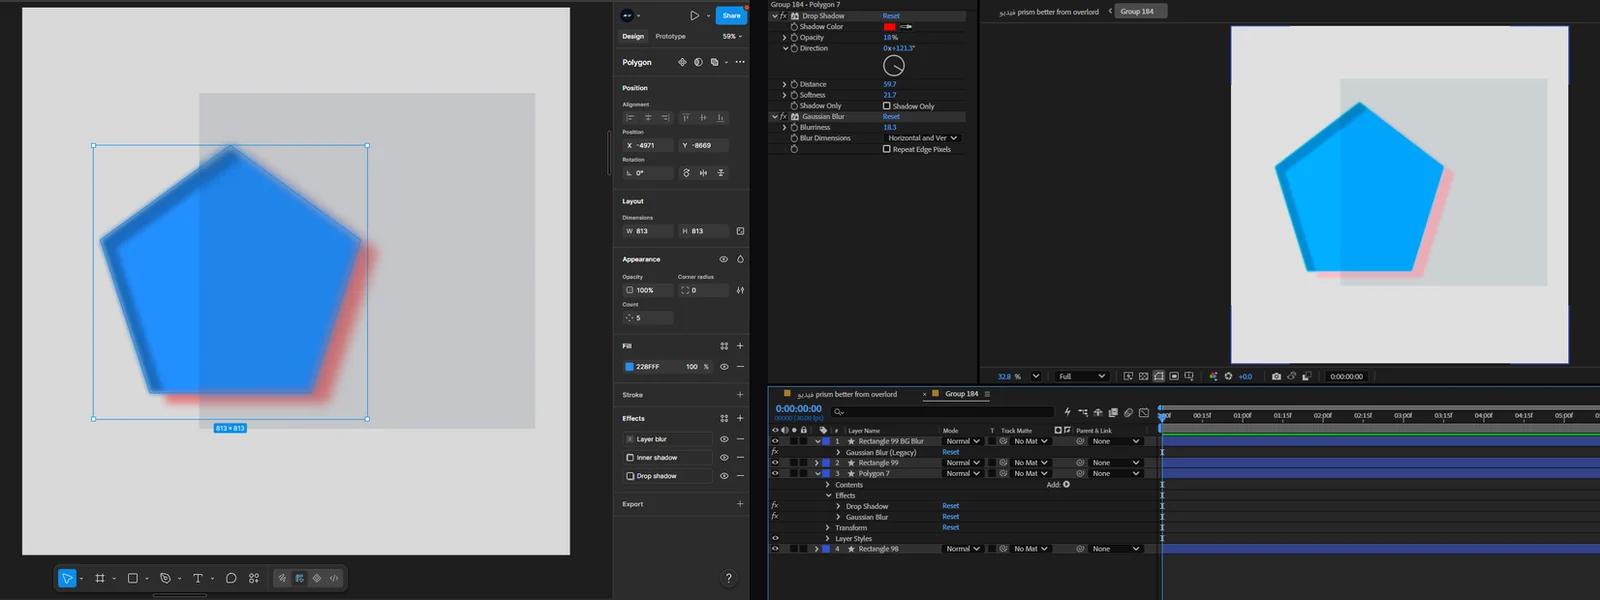
Each becomes a genuine effect on the layer rather than something baked into it. The screenshot shows both on one transferred shape: a drop shadow carrying its colour, its opacity, its direction, its distance and its softness, and a gaussian blur carrying its radius. Because they are real effects you can keyframe them, switch one off to compare, or drop something else in between. Inner shadow and glow transfer too.
Figma on the left, After Effects on the right
Opacity, per fill and per layerKept as two separate controls
Opacity, per fill and per layer
Figma has two different transparencies and designers use both: the opacity of a single fill or stroke, and the opacity of the whole layer.
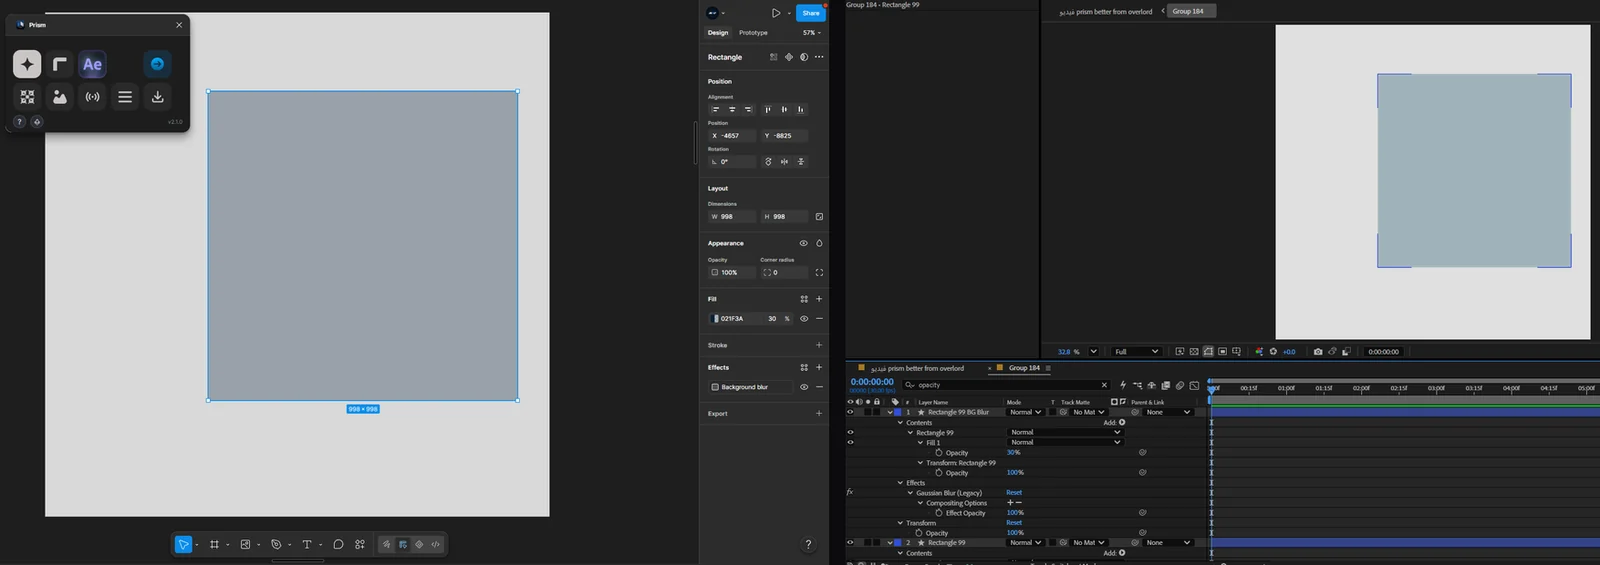
They stay separate on the way over. In the screenshot the fill is at 30 percent inside the shape while the layer transform is still at 100, exactly as the design had it, so lowering one does not silently change the other. Collapsing the two into a single number is the usual shortcut, and it is what makes a transferred design look almost right and impossible to correct.
Figma on the left, After Effects on the right
Images and complex vectorsFootage layers, placed and scaled
Images and complex vectors
Photos, image fills, icons, logos and any path too intricate to rebuild as a shape layer.
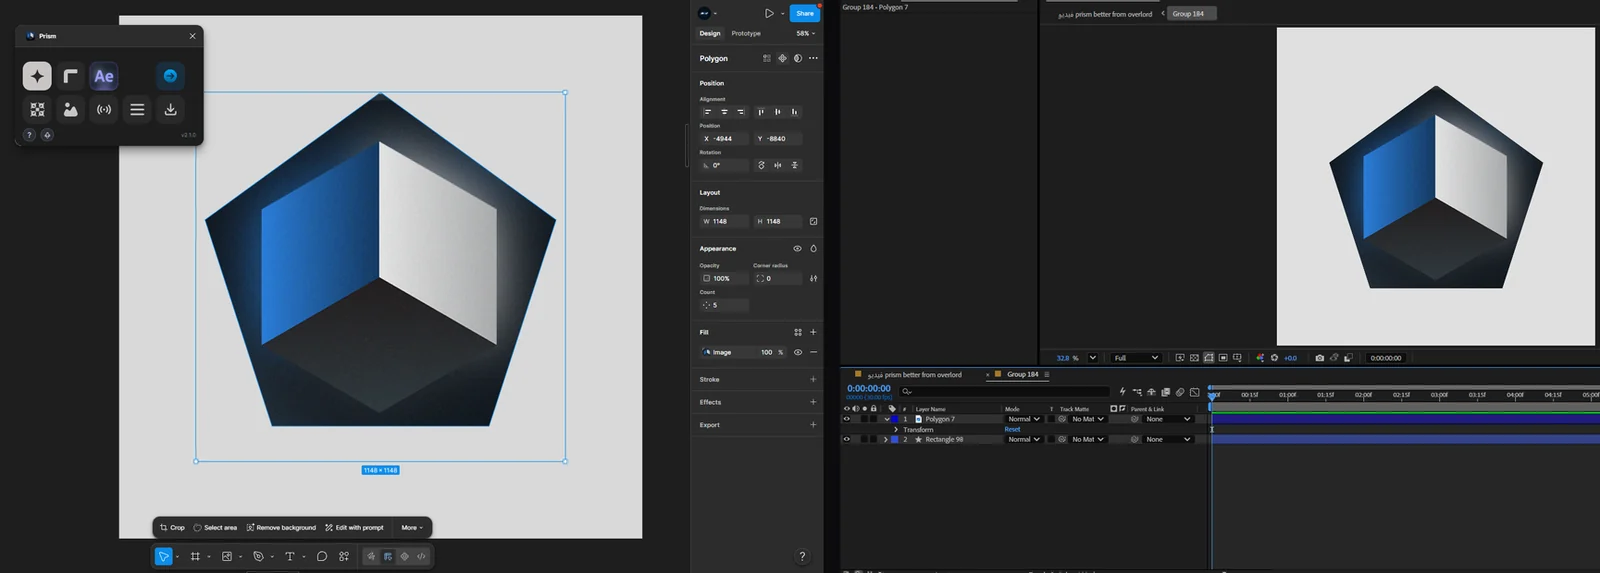
These are exported from Figma at full resolution and come in as footage layers pointing at real files, placed and scaled where they belong. The shaded prism in the screenshot is one of them: a piece of art no shape layer would reproduce faithfully, arriving sharp and in position instead of approximated. Swapping it later is a matter of replacing the file.
Figma on the left, After Effects on the right
Frames, groups and nestingThe same tree, as nested compositions
Frames, groups and nesting
The structure of the file: what sits inside what, in which order, and what is parented to what.
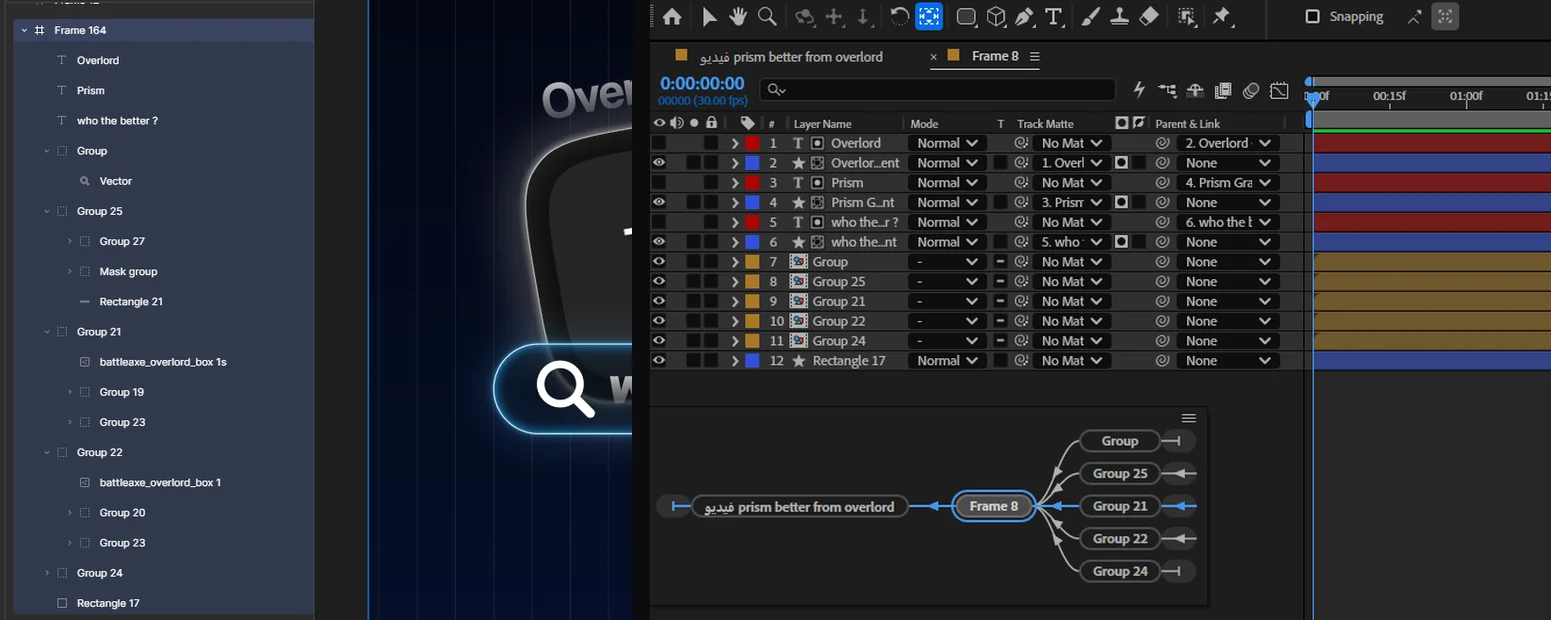
Put the two layer lists next to each other and they are the same list. Every frame and group in the design came across as its own composition, keeping its name, its place in the order and its nesting, with parenting links wired between the layers that had them. This is the difference between receiving a design and receiving a picture of one: you can open any part of it on its own and animate it without disturbing the rest.
Features
Feature 01
Editable Text
Text layers land as live AE text font, size, weight, alignment, colour, and line spacing all intact, ready to animate.
Font family & weight matched automatically from your installed fonts
Multi-line and mixed-style text fully supported
Anchor point centred on each text layer for frictionless animation
Feature 02
Gradients & Fills
Linear and radial gradients from Figma map to matching AE gradient ramp effects colours, stops, angles, and per-stop opacity.
Linear & radial gradient modes both supported
Multiple colour stops preserved exactly as designed
Solid fills, image fills, and fully transparent layers all handled
Feature 03
Full Layer Hierarchy
The entire layer tree groups, frames, and nesting is rebuilt in AE with matching pre-compositions and clean parenting chains.
Figma frames become nested AE pre-compositions
Groups converted to null objects for clean, controllable parenting
Layer order and z-depth faithfully reproduced
What does not transfer
Named plainly. A list of nothing but yes is not worth reading, and any of these would be found in the first ten minutes anyway.
Auto layout arrives as positions
After Effects has no equivalent of Figma's auto layout, so a stack arrives measured and placed exactly as it looked, but not as a rule that reflows. Changing one item's size will not push the others along.
Fonts have to be installed on your machine
The font family and weight are matched against the fonts you actually have. A font that lives only in Figma cannot be matched, and After Effects will substitute it the way it substitutes any missing font.
Prototyping does not come with the design
Prototype links, transitions and interactive states are a Figma concept with nothing to map onto in After Effects. What transfers is the design, not the prototype wired on top of it.
Windows today, macOS in progress
Prism runs on Windows. A macOS build is being worked on, and there is a waiting list rather than a promised date.
Common questions
Can you import a Figma design into After Effects?
Yes. Prism sends the design from Figma straight into After Effects, where it is rebuilt as native layers: shapes stay shape layers, gradients stay gradient fills and text stays editable, instead of arriving as one flat image.
Does the text stay editable in After Effects?
Yes. Each text layer arrives as a live After Effects text layer, keeping its font, weight, size, spacing and alignment, so you can rewrite a caption without opening Figma. The font is matched against the ones installed on your machine.
Do shapes stay editable, or do they arrive as images?
They stay editable. A rectangle, ellipse or polygon becomes a real shape layer with a live path, and its corner radius arrives as a Rounded Corners modifier you can still turn. Only artwork too intricate to rebuild as a path comes in as footage.
Are groups and frames kept, or is everything flattened?
They are kept. Frames and groups arrive as nested compositions with their names, their order and their nesting intact, and parenting links are wired between the layers that had them, so you can open any part on its own and animate it.
What does not transfer to After Effects?
Auto layout arrives as fixed positions rather than as a rule that reflows, prototype links and interactive states do not come across at all, and a font that is not installed on your machine cannot be matched. Prism runs on Windows today.
The same design also goes into DaVinci Resolve, where it is rebuilt as a Fusion node graph. That route has its own page, with its own screenshots and its own limits.
Prism moves Figma, Illustrator and Photoshop designs into After Effects or DaVinci Resolve as editable layers, and re-sends an edited frame without you losing the work you already animated.